Like many form applications, InfoPath has a Option Button control. InfoPath Option Buttons (sometimes called Radio Buttons) are useful when you have a very short list of choices (usually just 2 or 3) and want to expose all the choices on the form, rather than having the user click a drop-down control. Option Buttons allow selection of just one item in the group – they are all bound to a single field, and only one selection can be made.
Working with InfoPath Option Buttons
In our class InfoPath 2010 and SharePoint Server 2010 No-Code Workflow Deep Dive, students get some hands-on practice working with InfoPath Option Buttons. They can be a little tricky when you are first learning to develop forms, as they don’t behave exactly like other form controls. There can be a usability issue, too; once the user selects one of the choices (or there is a default choice already selected), they can’t UNselect it. They can change to another selection, but they are stuck having one of the choices selected, even if they really want to leave the group blank.
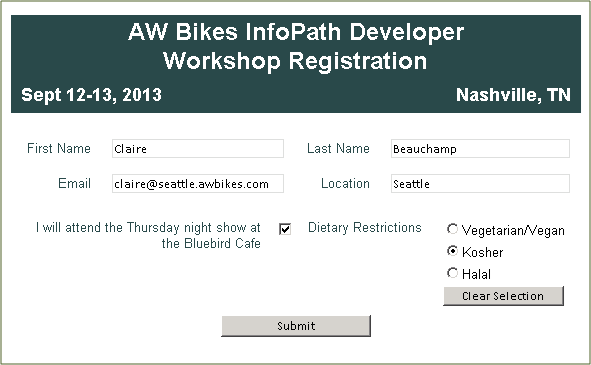
Luckily the form developer can add a little functionality to the form to allow for any selection in that group to be cleared. In the example below, there are Option Buttons for registrants to indicate dietary restrictions. There is no default content, and the field is not required. So, it’s possible for the form to be submitted with no option selected. If a user makes a selection and then changes their mind, or simply clicks on an option by mistake, however, having a way to clear the selection will ensure that the form is submitted with accurate data.
In the example below, Claire accidentally selected Kosher. As the form exists now, her only options would be to select another restriction, or to close the form and start over.
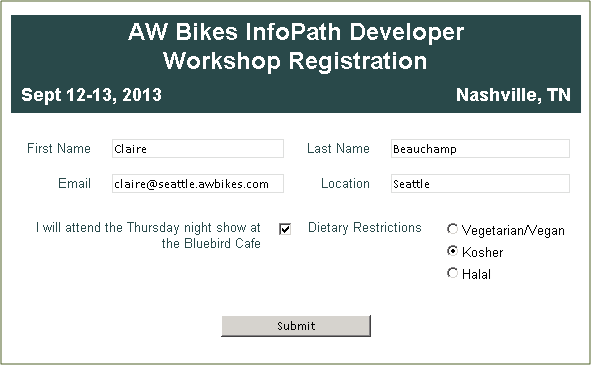
To allow her to clear the selection, we’ll add a button with a rule to reset the Dietary field to empty.
The first step is to add the Button Control to the desired spot in the form.
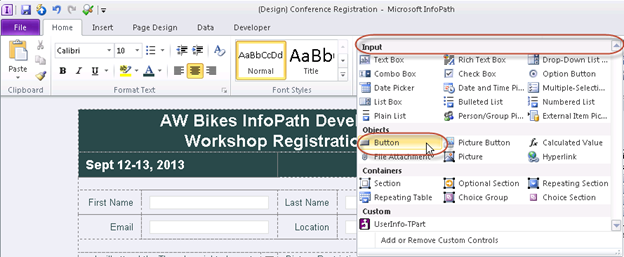
Next, update the Control Properties to change the button label from the generic “Button” to “Clear Selection.” In this example, I also made the text 9 point instead of the default 10 point, and made the button smaller than the default size. You could also have a very small unlabeled button, with a text label to the side. You could also use a hyperlink control.
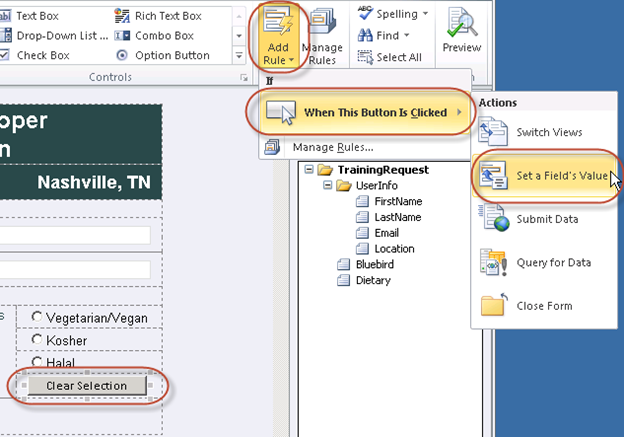
The next step is to add a Rule to the button to perform the desired action. Click the button to select it, then use the Add Rule button in the Ribbon to choose When This Button Is Clicked, then Set a Field’s Value as the Action.
The Rule Details dialog box will then appear. Click the Field Selector button. In the Select a Field or Group dialog box, choose the name of the field you wish to clear.
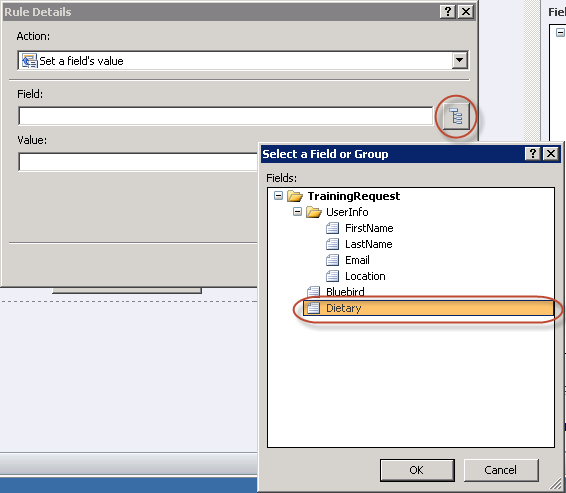
With most Rules of this type, you would then go on to use the fx button next to the Value field to indicate the data that should be added to the field. In this case, however, we are trying to clear the field completely. So, leave the Value field blank.
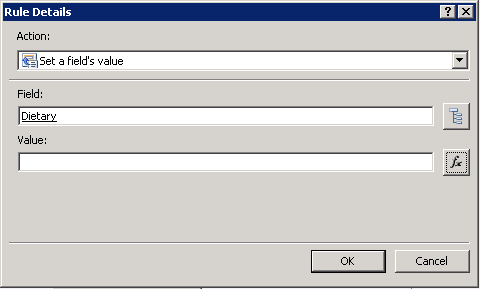
Now the form has a button that will deselect any selected Option Button for the Dietary field, and there will be no value associated with this field when the form is submitted.
PremierPoint Solutions offers SharePoint 2010 training and SharePoint 2013 training in-person and live online. We also offer introductory self-paced SharePoint CBT course for those who are not able to attend a live class.