Introduction
One of SharePoint’s neatest features is the People Picker. It allows a SharePoint user to elegantly query, identify and select SharePoint accounts. Did you know the People Picker is built on a set of publically available picker controls available to every SharePoint developer? Read the rest of this article to find out how to include a custom picker into your new SharePoint application.
Cast of Characters
Developing a custom SharePoint picker involves the creation and orchestration of three components, the Editor, Picker Dialog and the Query.
Editor
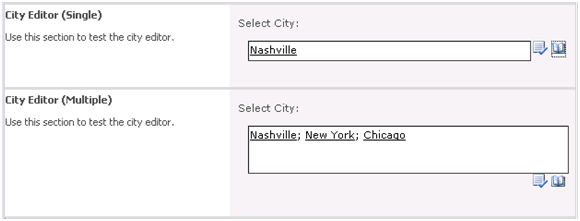
The editor provides an entry point for the user to express the selected entities. It also provides a launch pad to open a popup picker dialog box and search for entities. The editor class derives from Microsoft.SharePoint.WebControls.EntityEditorWithPicker.
Picker Dialog
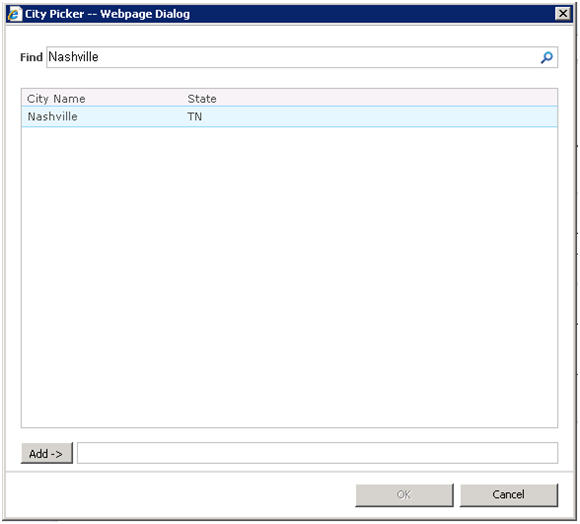
The picker dialog is a popup window which appears when the SharePoint user wants to search for one or more entities. This dialog box can be opened by clicking the editor’s browse button. By default the picker dialog is setup to take a search expression and display the matches in the results panel.
The picker dialog class derives from Microsoft.SharePoint.WebControls.PickerDialog.
Query
The Query control provides the visual results component of the picker dialog. This is the class responsible for accepting the search criteria, obtaining a list of matching entries and creating the table of matching entries to be displayed inside the picker dialog. The query class derives from Microsoft.SharePoint.WebControls.PickerQueryControlBase.
Entity Model
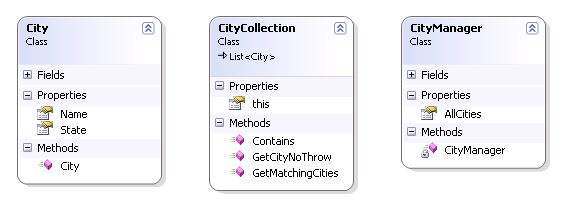
Before any of the picker components can be developed we need to identify an entity object to represent the selected data. A simple city entity can be represented with the following model.
Bringing the Picker Controls to Life
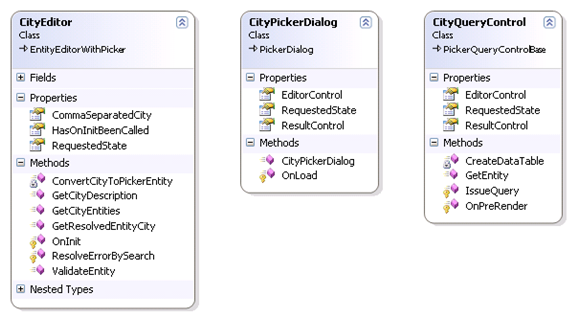
Once an entity is defined the editor, picker dialog and query controls can be created. Each picker control has references to the other two controls which creates a dependency between each con trol. As a result creating the three controls before defining the control body simplifies the process. We begin by creating a class named CityEditor which derives from Microsoft.SharePoint.WebControls.EntityEditorWithPicker. Second, we create a class named CityPickerDialog which derives from Microsoft.SharePoint.WebControls.PickerDialog. Finally, we create a class named CityQueryControl which derives from Microsoft.SharePoint.WebControls.PickerQueryControlBase. The three city picker controls have the following properties and methods.
Editor
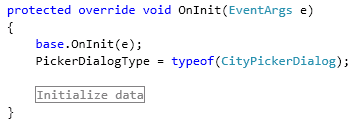
The editor provides an entry point for the user to express the selected entities. The main job of the Editor is to validate entities provided by the user and provide a launching pad to open a picker dialog box to search for entities. We start by setting up the picker dialog by setting the PickerDialogType property to the type of our CityPickerDialog class. This informs SharePoint to use the CityPickerDialog control when searching for new cities.
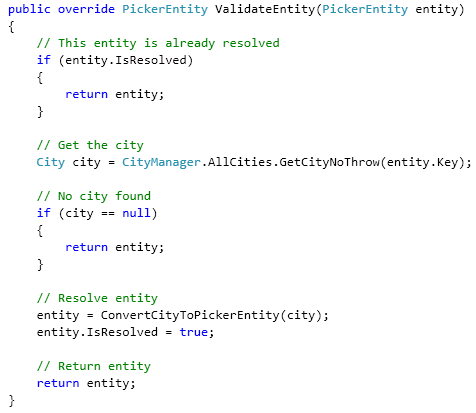
We then want to define how entities are validated by our city picker. We do this by overriding the ValidateEntity method. I this method we inspect each city provided by the user. If the city is not already resolved we look for a matching city in the AllCities property of the CityManger class. If a valid city is found we mark the city resolved. If not city is found we return the city in the current unresolved state.
The remaining CityEditor methods are used to convert entities between a City and a PickerEntity and allow a programmer to set an initial list of selected cities.
Picker Dialog
The picker dialog control is the simplest picker class to create. It is used to setup the dialog window properties and the column properties used by the search results. We start by defining the results control used to display the matching cities.

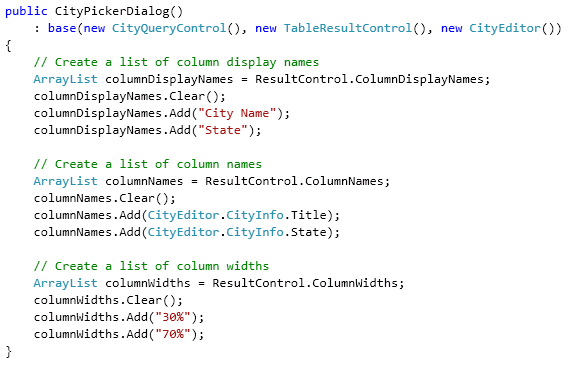
Most of work is done in the constructor where we set the results controls column display names, column names and column widths.
Using the OnLoad method we setup the title and description of the dialog window.

Query
The query control is used to issue queries and return the results to the picker dialog. The CreateDataTable method is used to create a System.Data.DataTable from the columns defined by the picker dialog control. The GetEntity method is used to convert a DataRow to a PickerEntity when an item is selected. The interesting work performed by the query control occurs in the IssueQuery method.
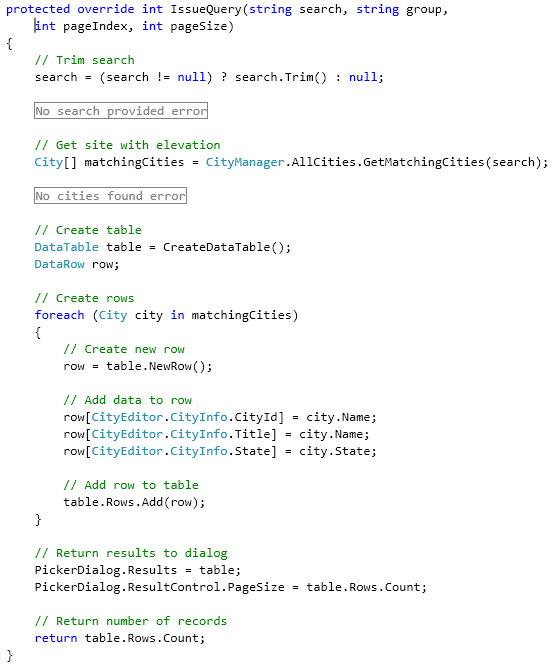
The IssueQuery method takes the search parameters and obtains the search results. The CreateDataTable method is called to build a DataTable used to pass our data from the query control to the picker dialog. Once the DataTable is filled with the results of the search the results are passed to the picker dialog using the PickerDialog.Results property. Finally the number of matching records is returned to enable paging if necessary.
Putting the Picker to Work
Once the editor, picker dialog and query picker controls are in place we can add it to a SharePoint page in the same manner as any other control. The first order of business is to add a <SafeControl /> entry for our assembly to the web.config file and register the control namespace at the top of our .ASPX page. We can then add the editor control.
City Editor (Single Entry)

City Editor (Multiple Entries)

The final step is to obtain a list of resolved entities when a page action occurs. To get a list of resolved entities simply call the ResolvedEntities property of the CityEditor instance.

Conclusion
Many people see SharePoint as an extremely effective collaborative solution. As a software developer you should also notice the folks at Microsoft have done an excellent job making SharePoint a platform for your custom applications. By taking a bit of time to understand the SharePoint architecture you can take full advantage of the infrastructure provided. Custom pickers are an effective way to maintain consistency with the SharePoint UI while reducing the amount of work required creating a custom solution.