The ostensible purpose of the Calendar Overlay feature in SharePoint 2010 is to aggregate multiple calendars into one master, or roll-up calendar. The appointments in each calendar can display in an assigned color, allowing for a quick visual impression of which appointments belong on which sub-calendar. This feature can be used to show more than just calendar appointments, however. You can use the SharePoint Calendar Overlay with a Library or other List to show any date-related item.
In my previous blog post, I described how the SharePoint 2010 Calendar Overlay feature could be used to color-code individual appointments in a single calendar. The trick is to create views of types of appointments (based on perhaps a custom metadata column you might add to the Calendar). The Calendar Overlay can then be used to assign a color to each view. Then, each appointment in that view will have the assigned color.
In this post, I’ll show how to use SharePoint Calendar Overlay with a Library or other List to show items based on any date metadata field. In our example, the IT department has the default Team Site Calendar that they use for general items. In addition, they would like to include on this calendar the anticipated end date for their major projects, and the review date for the various contracts they have with vendors. This information is already captured in a Project List and a Contracts and Agreements Library. Both the Library and the List have a column for a date. Using these I can (a) create a view for each one that is a calendar, then (b) use Calendar Overlay to roll those dates up into a master Team calendar.
The first step is to create Calendar views of the non-calendar lists / libraries. Below is the Contracts and Agreements Library in the typical list format. Each document has a Review Date; that will be the basis for the Calendar view.

-
Go the Library ribbon and click the Create View button.
-
In the Create View page, click the Calendar View link.
-
Type in a Name for the view, such as Review Date Calendar.
- We have only one relevant date column in this Library, so we’ll choose Renewal Date in both the Begin and End fields in the Time Interval section. Use the document Name as the item heading in the Month, Week, and Day views.
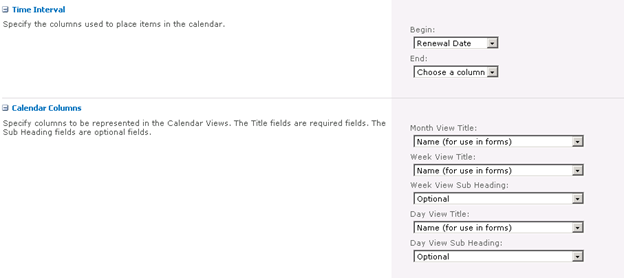
- Add any other needed settings and click OK.
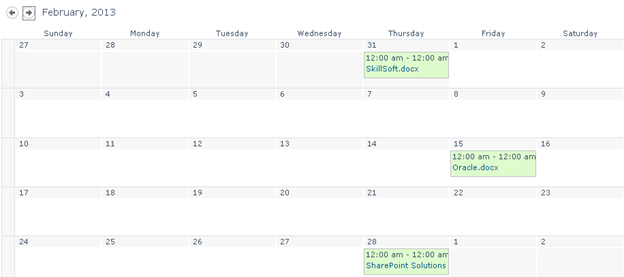
This gives us a view of the Library in a Calendar grid, based on the Review Date.
Here is the list of Projects that the IT department is currently working on.

Following the same steps outlined above with the Library, create a Calendar view for the list, using the Completion Date as both the Begin and End date for the Time Interval. (We want to show only the Completion Date on the Calendar, not the entire span of the project from start to finish.)
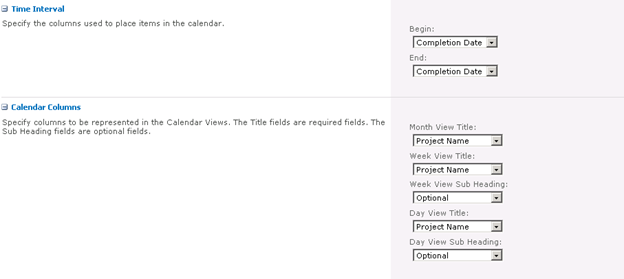
The resulting Calendar view looks like this:
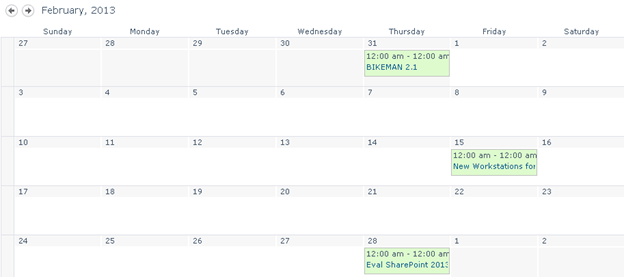
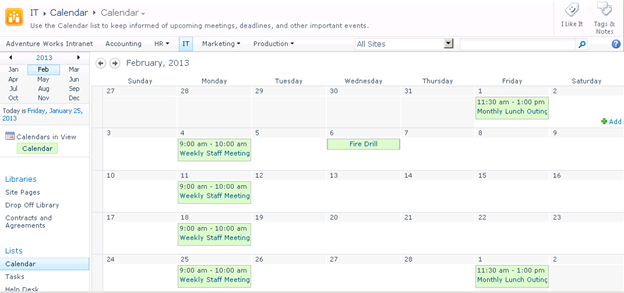
Now that we have Calendar views of the Library and the Project List, we can use Calendar Overlay to roll them up into the department’s main SharePoint Calendar, shown here:
Following the steps outlined in the previous post on Calendar Overlay, add the Library and Project List to the Calendar. Briefly:
- In the target Calendar, click the Calendars
Overlay button in the Calendar ribbon.

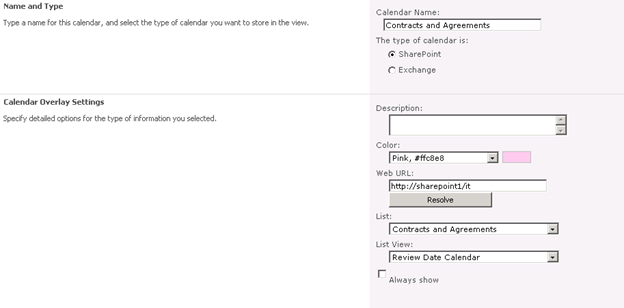
- Click the New Calendar link and add the relevant information for the Contracts and Agreements Library.
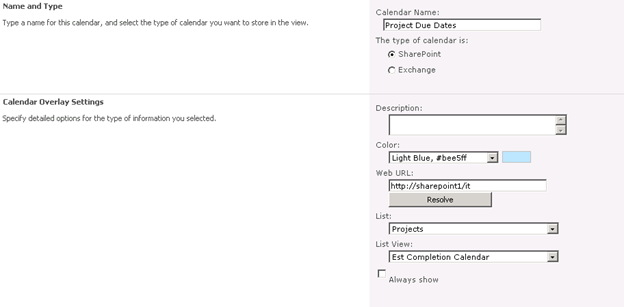
- Repeat to add the Projects List.
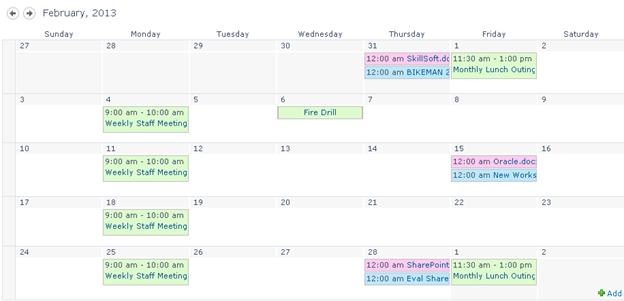
The main IT Calendar now includes not only the events placed directly on that calendar, but the dates from the Library and Project List as well.
If you would like to learn more about Calendars, Lists, Libraries, or other features of SharePoint, take a look at our SharePoint 2010 training and SharePoint 2013 training. We would love to see you in class!