The problem: Having to install SharePoint on a server OS has been a consistent cause of complaint for years within the SharePoint community, especially for developers. The proliferation of virtualization technologies (such as the free Virtual PC and VMWare Server for client OS’s, and Virtual Server and Hyper-V for server OS’s) have helped to soothe the pain – but didn’t make it all better for many. The picture has gotten more complicated with SharePoint 2010. Now 64-bit hardware and operating systems are required for SharePoint 2010 all SKUS, which significantly narrows the options for desktop lab environments. Hyper-V is the only Microsoft virtualization technology capable of running 64-bit guest machines, but it only runs on a Windows 2008 Server host machine.
I have so far been running my Win2k8 SharePoint 2010 guest virtual servers on a spare desktop machine running Win2k8 with Hyper-V. This is a more traditional development environment for SharePoint, and it is still nice from several perspectives. 1) I have snapshots to do the ‘I was never here’ trick easily if (when) I mess something up, 2) I can give the VMs more RAM than I could on my laptop, and 3) I can run more than one VM to simulate an actual farm. However, it’s not a very portable environment. It would be very handy as I travel to have a simple single-server farm that I could boot my laptop into wherever and whenever I felt the need.
Even if your laptop or desktop is 64-bit, most of us probably aren’t running a server OS on it. I did try using Windows 2008 Server as my laptop OS for a couple of months, but the performance load of Hyper-V and the SharePoint guest resource requirements caused a significantly slower environment than I was prepared to accept for my everyday use. I know there are low-cost alternatives using VMWare’s free product, but that still would still have the duplicate host / guest resource issue. I also wanted to see if it was practical to use Microsoft software because of my familiarity level with it.
Two solutions: There are two new developments (one in SharePoint 2010 and the other in Windows 7) that open some new doors to the desktop / laptop dev environment. TechNet now documents that 1) SharePoint 2010 offers an option for installing on a client OS – at least for development use, and 2) that a pre-installed and configured vhd can be mounted as a secondary bootable drive on a Windows 7 PC.
In this post, I will document my experience mounting a pre-installed Win2k8 R2 server vhd as a bootable drive on my Windows 7, x64, 4gb RAM laptop. In a previous post, I documented my experience installing SharePoint 2010 directly on Windows 7.
Now Windows 7 natively allows us to boot into vhd files instead of just the physical drive partitions. That’s pretty significant and will probably have big implications for many admins and developers. It is not as simple as installing SharePoint 2010 directly into Windows 7, but it has distinct advantages. For instance, we can have multiple versions of the server stored as separate vhd files for different testing scenarios. We can also make a temporary copy of any vhd file before booting into it to maintain kind of a quasi-snapshot capability. It also offers me more of an ‘apples to apples’ comparison to a production farm (since it’s on a server OS) and allows me to use hardware on the PC that doesn’t work in HyperV – like wireless network cards, for instance.
Mounting a bootable vhd drive in Windows 7 – The nitty gritty
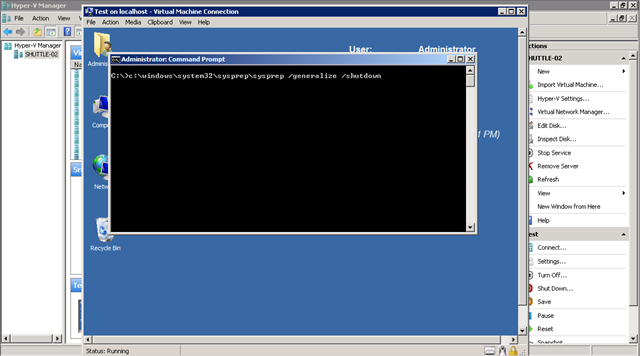
- Log into your existing SharePoint virtual machine, and run the following sysprep command within the virtual server:
c:windowssystem32sysprepsysprep.exe /generalize /shutdown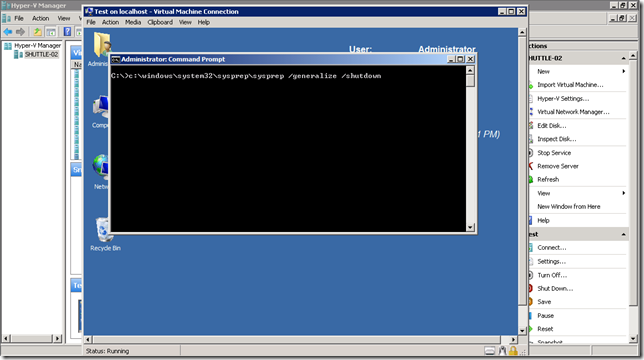
- Once the sysprep command completes and the virtual machine shuts down, copy the server’s vhd file onto the physical drive of your PC. Mine was copied to C:VHD2010AllinOne.vhd.
- BCDEdit is a command-line utility new to Windows 7 that allows you to edit the Boot Configuration Data, including creating a boot menu for multiple operating systems or at least disks.
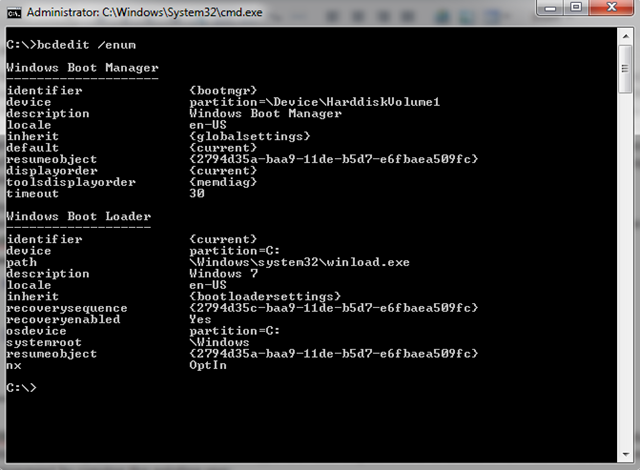
Open a command prompt with administrative privileges, and type bcdedit /enum. This will print out to the screen the current setup of your Windows 7 bootloader, which probably has only a single boot option.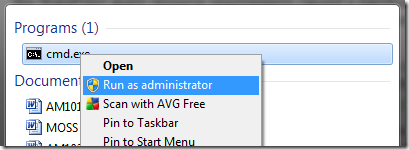
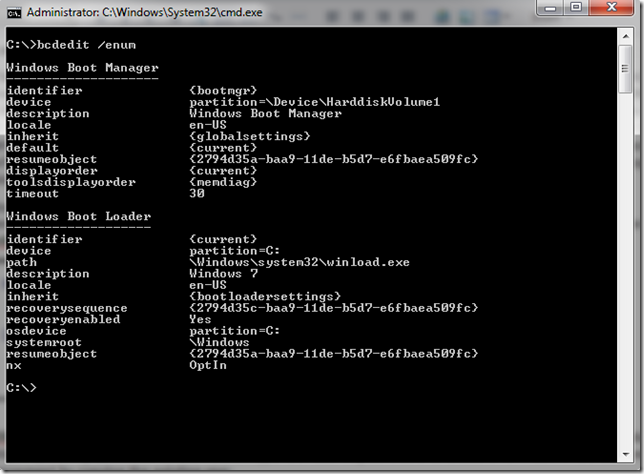
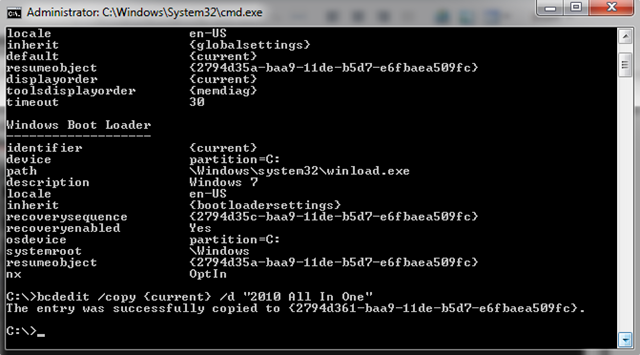
You’ll notice that there is a Windows Boot Manager section, and currently only one Windows Boot Loader entry. That’s about to change. - Type the following command to create a new item in the boot menu named “2010 All In One” that we will use for our 2010 lab environment by copying the existing one:
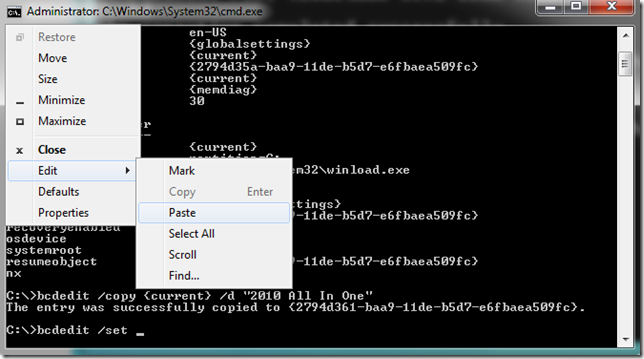
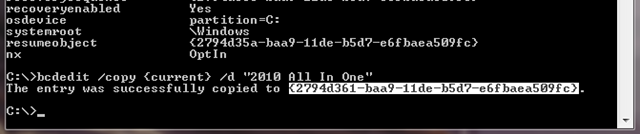
bcdedit /copy {current} /d “2010 All In 1”
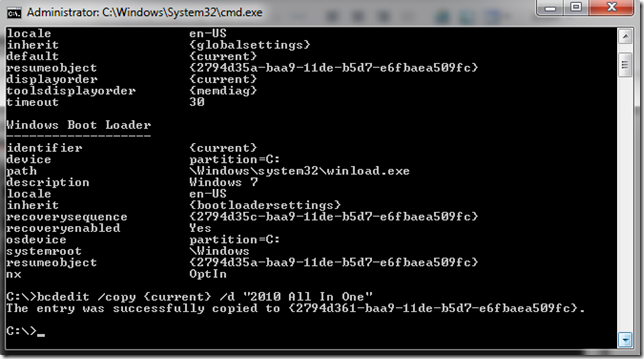
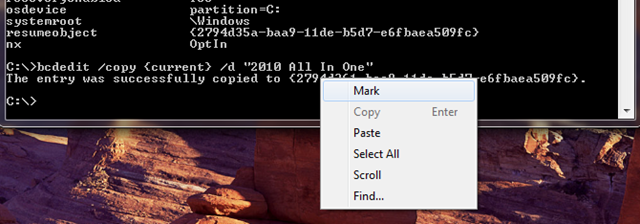
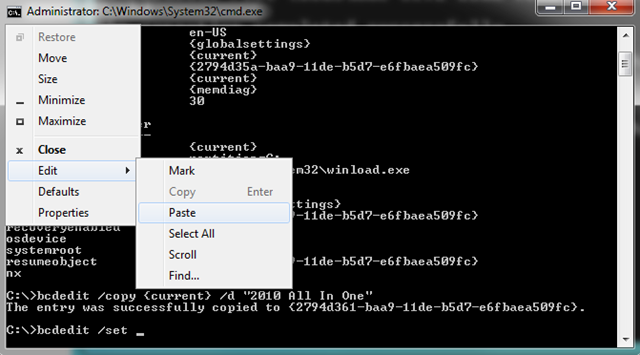
The /copy command created another boot menu entry and assigned it a new GUID. (Every Windows Boot Loader entry has its own GUID, even though you have to look very closely to see the difference). However, the new boot menu entry is not wired up to our VHD file. So, we need to add another two related commands to tell the new menu entry where to point. The GUID can be typed if you really want to, but I suggest copying it. - If you right-click on the GUID in the last line output to the command prompt and choose Mark, then you can highlight the GUID with your mouse. The ENTER key copies it to the clipboard.


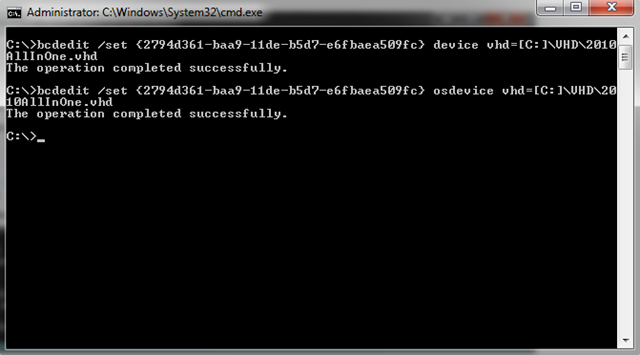
The following are the complete commands to type and paste into the command prompt.bcdedit /set {pasted guid} device vhd=[C:]VHD2010AllInOne.vhd
bcdedit /set {pasted guid} osdevice vhd=[C:]VHD2010AllInOne.vhd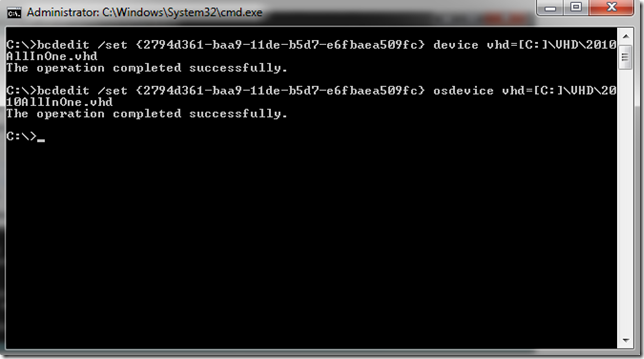
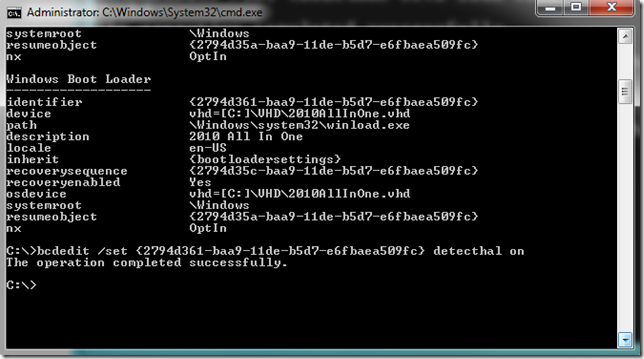
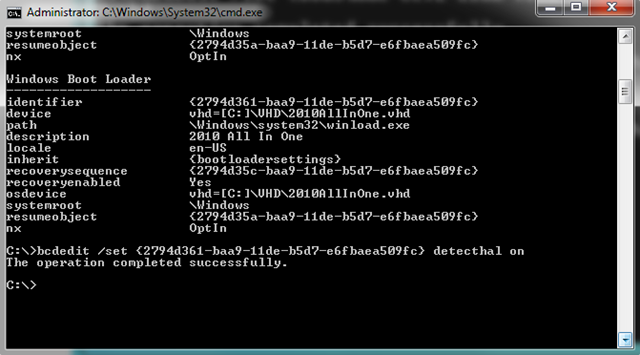
- Finally, we need to force the new bootloader entry to auto-detect the VM’s Hardware Abstraction Layer.
The end result should be a dual-boot menu with a choice for Windows 7, your native OS, and 2010 All In One, your SharePoint lab VM. In my case, I have SharePoint 2010 installed on both Windows 7 and Windows 2008 R2 – all running natively on my 64-bit HP laptop with 4 gb of RAM. So far, things are working very well for me.
NOTES:
- If you get a BSOD when you try to boot into the VHD, it’s probably because you didn’t use the Generalize option when you did the sysprep command. (I, um, have ‘a friend’ that did that once…)
- This boot to vhd trick allegedly will work with a Windows Vista client OS too – with a little hacking. I won’t go into it here, but Google “windows 7 vhd dual boot vista bootmgr bcdedit” and you’ll find several brave adventurers who can take you down that path if you wish.
- I worked under the assumption that many developers / admins would already have a test server built as a VM by the time they stumbled across this procedure. So these instructions show how to repurpose an existing VM onto your client PC in a dual-boot scenario. If you do not have an existing SharePoint 2010 vhd file, here’s a link to a TechNet blog post with a webcast that describes how to create the vhd dual-boot environment with nothing more than a blank hard drive, a Windows 7 DVD, a Windows 2008 R2 DVD, and a dream…
- You can use a dynamically-expanding vhd file, but it does something at boot time that may surprise you. It automatically expands to its full size. Interestingly, it contracts again to it’s smaller size when you shut it down. That means you don’t have to maintain enough space for the full drive, but you do have to free up enough space for the entire drive before you try to boot into it.